
How to Grill the Perfect Steak over Charcoal
The secret isn’t a trick. It’s thickness, structure, and fire control.
There are thousands of articles and videos about how to grill a perfect steak. But when you scroll through them, you may realize something.
A lot of them focus on seasoning. Some debate flipping a steak once versus flipping often. Others focus on grill marks. You’ve probably seen them all.
But almost none of this perfect-steak content starts with what I believe is the single most important variable of all:
Steak thickness.
If you want consistently great steak over charcoal, this is where you should start.
Buy a thick steak. At least 1½ inches is a bare minimum. Two inches is ideal. Two-and-a-half inches is perfection (see my Tomahawk Steak Reverse Sear Post)
Honestly, anything thinner than these thicknesses and you are, quite literally, playing with fire. Don’t put yourself through those struggles. Steak is getting more expensive every year. So if you’re going to splurge on a great marbled steak and you want it to turn out perfectly over hardwood heat without hoping and praying, then start with a nice thick steak and you are already well on your way.
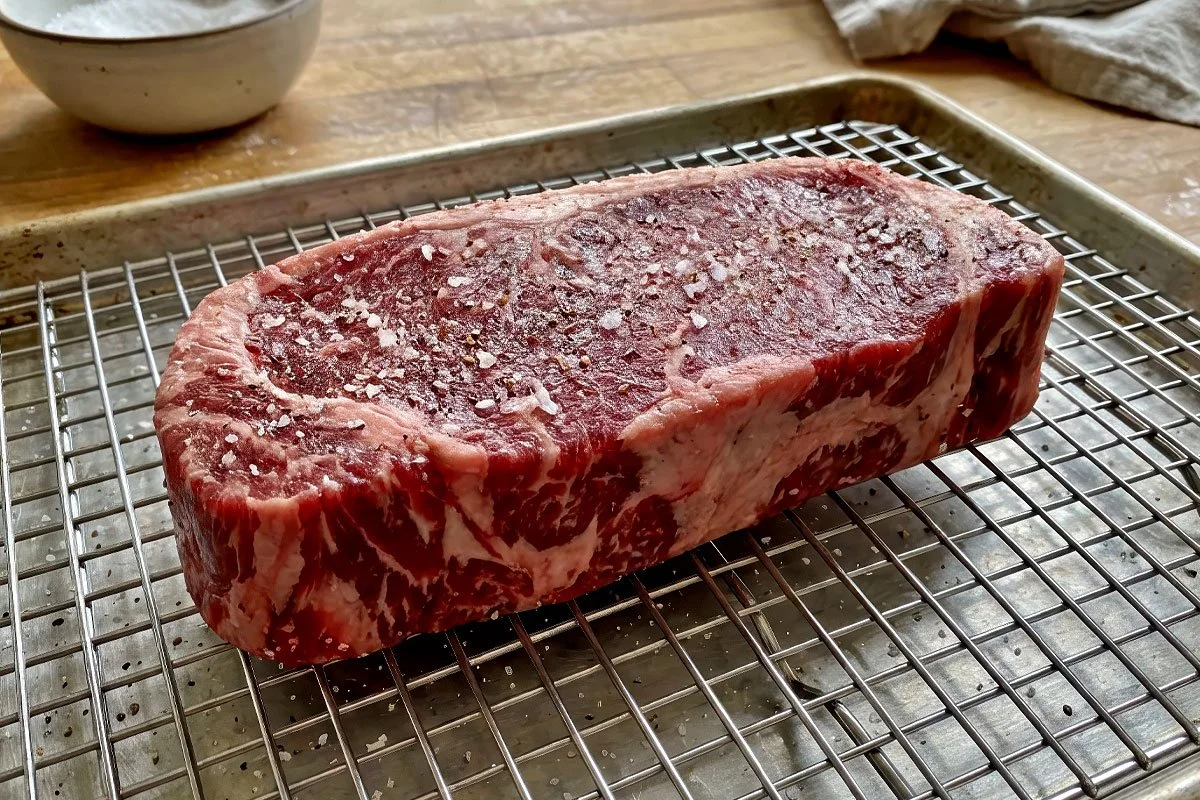
Nice thick New York Strip steak, ready for reverse sear.
Step One: Start With the Right Steak
A thin steak cooks too quickly, especially over live fire. By the time you build a proper crust, the interior is already overcooked. Game over. There is no margin for error. You’ve probably been there.
A 2-inch steak, on the other hand, gives you:
Time to work with it
Control over your target temperature
A real temperature gradient to work with and
Room to develop crust without sacrificing that perfect medium-rare centre
Skip the grocery store and go to a butcher for a true, thick and well-marbled cut. Ask for something substantial: ribeye, striploin, Tomahawk, whatever is your cut of choice.
Quality definitely matters, but thickness matters more. A thick steak changes charcoal cooking from a gamble into a system.
Why Charcoal Changes the Game
Cooking over lump charcoal is different than cooking over gas.
You’re not just applying heat. You’re cooking over hardwood embers.
When fat renders and drips onto hot coals, it vaporizes and rises back up as flavor. That interaction between meat and combustion is what makes charcoal-grilled steak taste distinct.
But to control that kind of flavour creation, you need structure in your process.
Reverse Sear: The Coal Structure That Makes This Work
If you will be using one grill for the whole cook, you don’t want to have the entire grill over an even layer of coals.
For the reverse sear to work on steak, you will need either a two-zone set-up on a single grill, or, use two grills, which is what I like to do. I like using two grills because it gives me a lot more space for multiple steaks and I can have my high-heat searing charcoal ready to go at full heat, when needed.
Two zones or two grills, the objective is the same:
One zone with a concentrated bed of fully lit lump charcoal (high heat direct)
One zone with little or no charcoal (indirect heat)
This gives you flexibility.
You are not cooking a steak over “a grill.”
You are cooking it across environments.
That distinction matters, because that’s what will give you the perfect steak every time, stress-free.
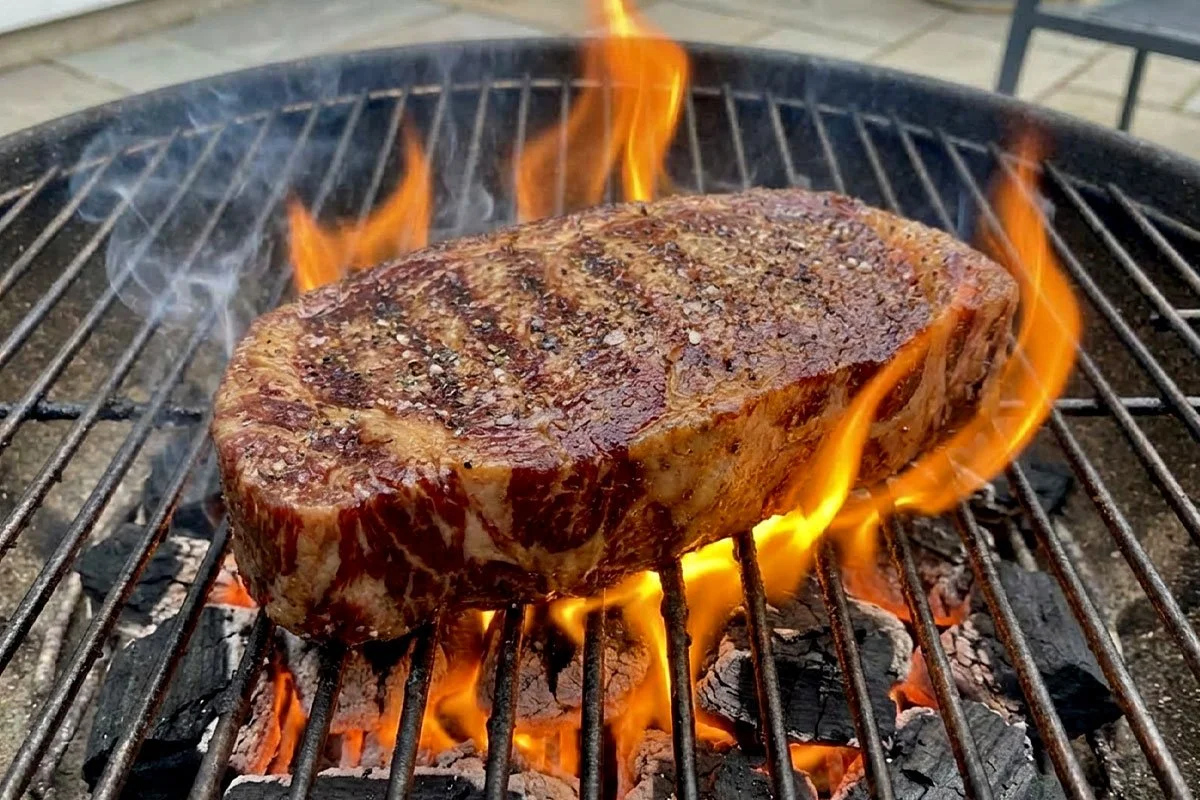
Start of the searing process.
The Reverse Sear Method (My Go-To Approach)
For thick steaks, the reverse sear method is the most reliable system I know. Here’s how I run it.
First, I salt the steak liberally on both sides (and the edges) with coarse salt approximately nine hours before I grill. No other seasoning is needed. I keep the steaks refrigerated (with the salt on them) for seven hours, and then let them rest at room temperature for the final two hours before cooking. By this time the salt will have worked it’s magic. (You can read more detail on this approach in my post on Tomahawk Steaks.)
1. Stabilize Your Indirect Zone
Bring your smoker/grill to around 225°F indirect heat, with the lid closed. I use a kamado on indirect heat for this part.
Let your charcoal stabilize at your desired temperature. You want clean combustion — thin, almost invisible smoke.
Place the steak over indirect heat. Insert a probe thermometer horizontally into the center of the steak. An added benefit of a 2-inch thick steak is that you have plenty of room for a remote probe.
Now you wait.
At 225°F, a 2-inch steak typically takes me approximately 45 to 60 minutes to reach my target internal temperature. More on that below.
This low-and-slow approach does two things:
It dries the surface slightly, which improves crust development.
It cooks the interior evenly, edge to edge.
You’re not blasting it with direct heat. You’re building structure.
2. Pull the Steak Before Your Doneness Temperature
If your target doneness is medium-rare (around 130°F –135°F final), pull the steak from indirect heat at about 118°F–122°F.
For me, 120°F is a good sweet spot to aim for.
It is critical to pay attention here, as you don’t want to get too far past your target.
If you wait until your steak hits your final temperature before searing, you will almost definitely overshoot when you sear.
3. Full Blast Sear
Now move the steak over your hot zone, or your preheated charcoal second grill. (If you are using one grill with a two-zone system, you will have to wait for your grill to come up to searing heat. This is why I prefer to use two grills.)
Open the vents wide and let the fire breathe.
You want aggressive radiant direct heat to work its magic.
Because the interior is already nearly done, this phase is about crust — not cooking through. Because the steak is so thick, you have a lot of insulation to work with. It’s amazing that when you’re searing that crust at extreme temperatures (for a few minutes), the interior temp will barely move. It certainly should not rise quickly. If you want that perfect crosshatch pattern, this is the time to do it. Pay attention to how your steak is sitting on your grill grate and move it appropriately (I generally don’t fuss too much with grill marks).
If you keep a remote temperature probe in the steak during this phase, you can watch over the exact numbers. Watch the temp climb. Flip as needed to control flare-ups and prevent burning (or to get a grill pattern).
During this phase, you are looking for:
Deep browning
The sound of the sizzle
Controlled flame interaction
Final internal temperature around 130°F –135°F after resting
The beauty of the thick steak is that you can sear hard without losing the centre.
That’s why thickness matters.
Managing Flare-Ups Without Panic
When fat hits lump charcoal, it flares and releases flavour back up towards your protein. If you want a great video out of this, have someone nearby with camera ready.
This fiery show is all part of the process.
The key is to stay in control during the charring process:
Flip more frequently if flames get aggressive. Don’t be afraid of the flames, but don’t let them burn your steak either. (See my post on char vs burned)
Move temporarily back to indirect if necessary.
Avoid pressing the steak down (that only fuels flare-ups).
Because you built a two-zone system, you always have an escape route.
That’s fire control.
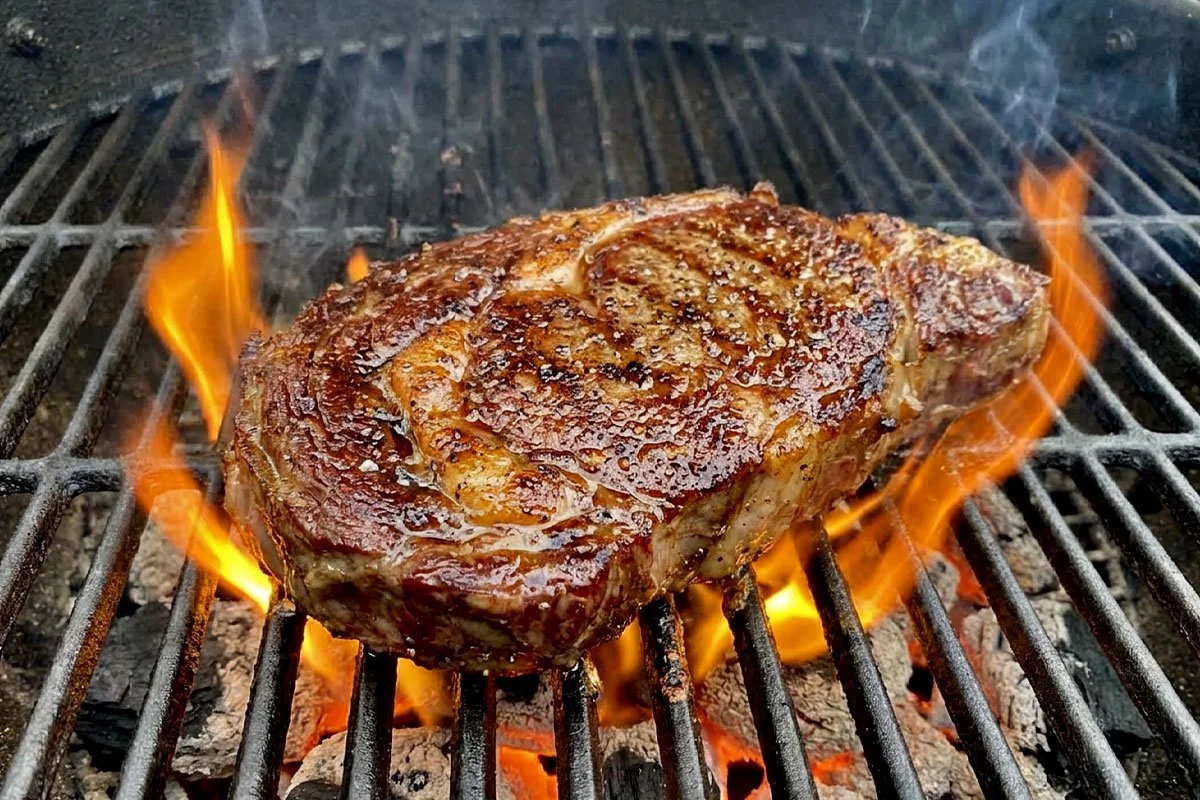
End of the searing process.
Why This Works Better Than Starting Hot
Traditional steak advice says: start hot, then move indirect.
That works — sometimes.
But with charcoal grills, starting hot can create problems:
The exterior chars before the interior warms.
The crust forms too early (and then sits while the steak cooks indirect, not as crispy as reverse sear).
You lose the ability to manage internal temperature precisely.
Reverse sear solves all of this by separating cooking from crust formation.
First you cook the interior gently.
Then you apply controlled intensity to get the cherished crust and char.
It’s structured combustion. I have tried cooking steaks in virtually every possible way over the years, and the reverse char is by far my most recommended method. But, again, you need a thick steak to do it justice.
The Hand Test Still Matters
Even with a probe thermometer, don’t ignore the feel of the heat.
Before searing, hold your hand three inches above the cooking zone.
If you can only hold it there for 1–3 seconds, you’re in true searing territory.
That radiant intensity is what builds crust quickly without prolonged exposure.
Resting and Carryover
After searing, let the steak rest for 5–10 minutes.
Because you pulled early, carryover cooking will bring the interior up a few degrees.
Cut too soon and you lose juices.
Give it a moment. You’ve already invested an hour. Another five minutes is an important final step.
Why Steak Thickness is the Real Secret
Most steak failures over charcoal come down to one thing: The steak was too thin.
With a thin steak:
You can’t separate indirect and direct phases meaningfully.
You don’t have room for error.
You can’t build a serious crust without overcooking.
With a 2-inch steak:
You control the timeline.
You control the gradient.
You control the finish.
And when you’re cooking over live fire, control is everything.
It’s Time to Grill Some Steak
The perfect charcoal steak isn’t about grill marks and 90-second turns for cross-hatch pattern and so on.
It’s about structure. So forget the aesthetics (at least until you master the process) and focus on:
Structure in your coal bed.
Structure in your heat zones.
Structure in your process.
Structure in the cut of meat itself.
Get the thickness right. Cook indirect to 120°F. Sear hard over real hardwood coals.
Do that consistently, and you won’t be guessing anymore.
You’ll be managing fire and serving up some perfect charcoal-grilled steaks.
To get the flavour right for this recipe (and for all your hardwood cooks), it’s important to master clean combustion. See my Complete Guide to Smoke in Hardwood Barbecue for how to avoid bitter creosote."
By Mike Belobradic
Founder of the Northern Barbecue™ Method
Visit the shop for barbecue t-shirts, hoodies and sweatshirts.